Here is a step-by-step guide for sewing a side seam pocket (sometimes also known as in-seam pocket). The steps are for garments with a waistband. It's based off this Maven Pattern tutorial, but much simplified.
Note: A 5/8″(1.5cm) seam allowance is used in this post.
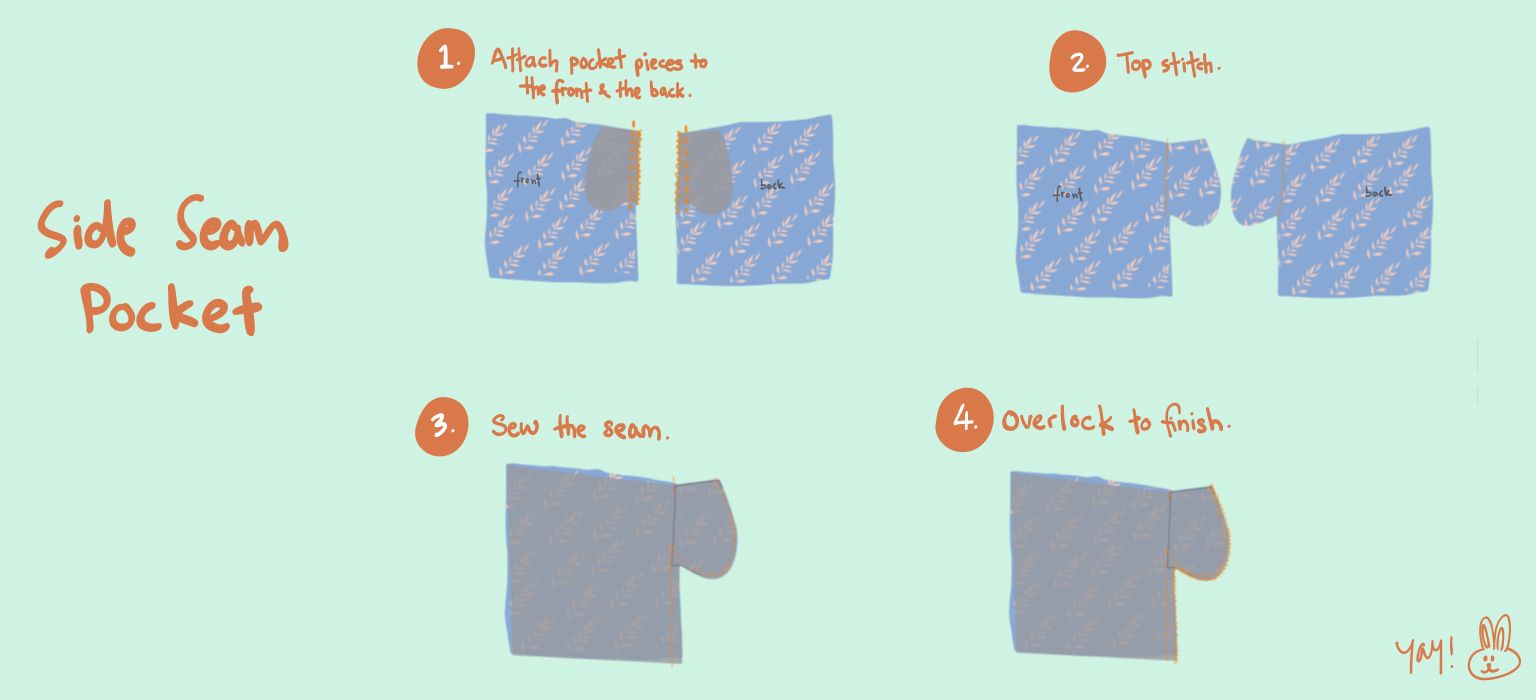
Step 0: Cut out the pocket bag pieces
- Use a pocket pattern that you already have, or simply draft one yourself.
- Make sure to add the curvy bit at the bottom to help with overlocking later on (a trick that I learned from the Maven Pattern tutorial).

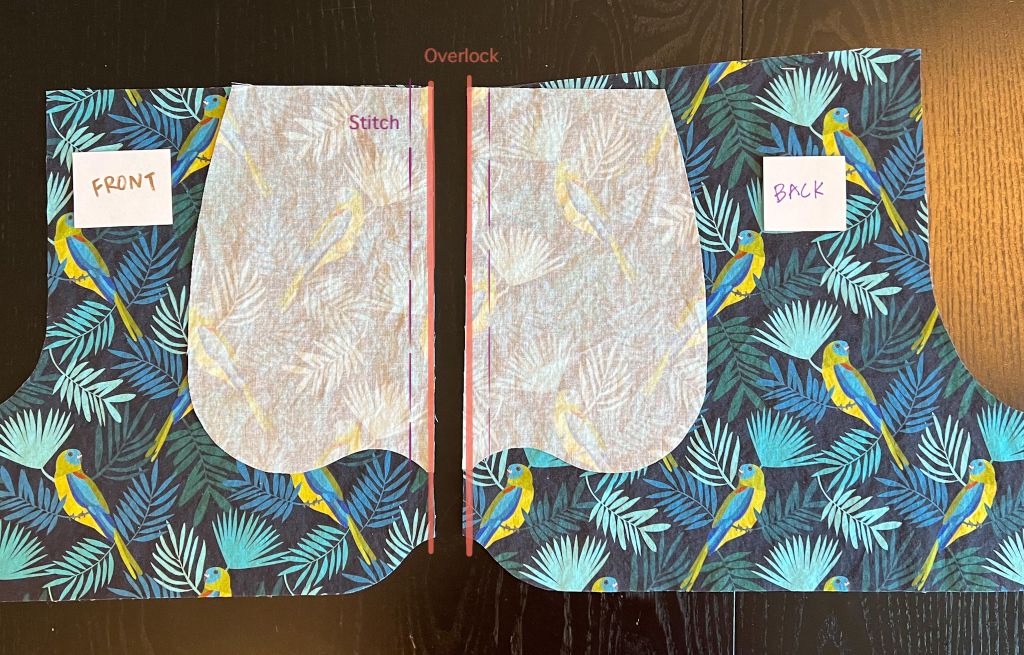
Step 1: Stitch along the garment side seams and overlock
- Align the pocket pieces to the garment side seams. Stitch into place (the dashed purple line in the photo below) with 3/8" seam allowance so that the pockets will sit slightly inside when finished.
- Overlock the entire garment side seams (the orange line in the photo below).
- Press open the pocket pieces.
- (Optional) Understitch the front piece 1/8" from the edge, if desired. This understitch will prevent pocket bag from rolling out to the front. I don't find this a problem most of the time except when using super soft/silky fabric.
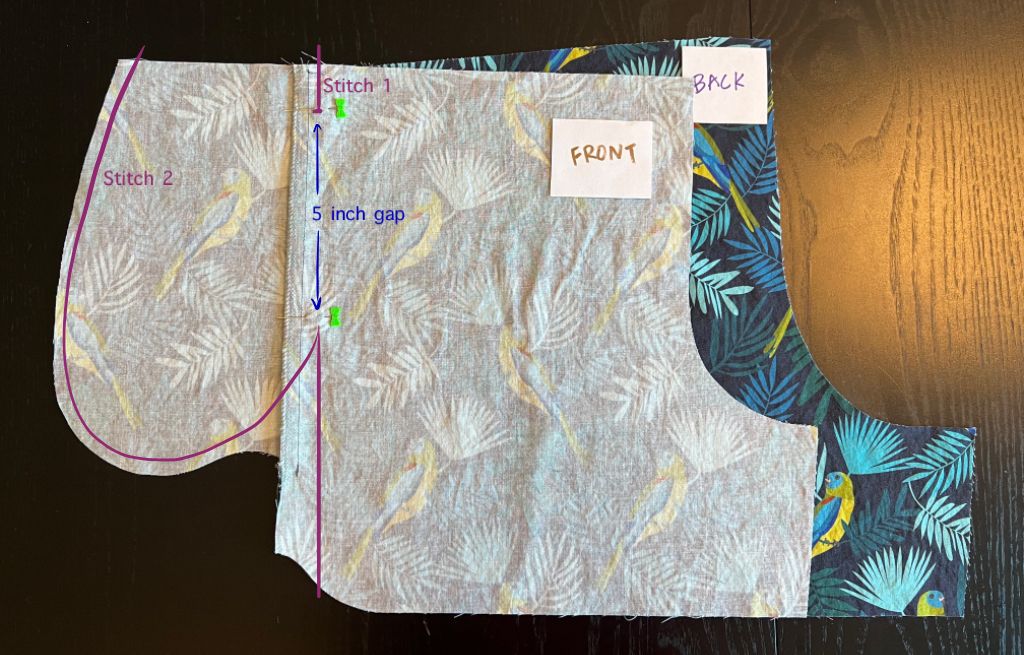
Step 3: Stitch the front and back pieces together
- Line up the front and back pieces along the garment side seams. Pin 1” from the top, and again 6” down, leaving a 5” gap as the pocket opening. NOTE: You can adjust the gap to suit your hand size.
- First, Stitch 1: From the top of the waist line stitch down to the 1” mark with a 5/8″ seam allowance. Reverse stitch to secure.
- Then, Stitch 2: With 5/8″ seam allowance start stitching from the edge of the pocket along the curve, up to the second pinned mark, pivot, then down along the entire garment side seam.
Step 4: Overlock to finish
- Overlock the pocket starting from the edge, along the curve, and follow the curvy bit at the bottom towards the side seam.
- Press the pocket towards the front of the garment and this pocket is done! Repeat on the other pocket, or follow the rest of the garment instruction to finish.

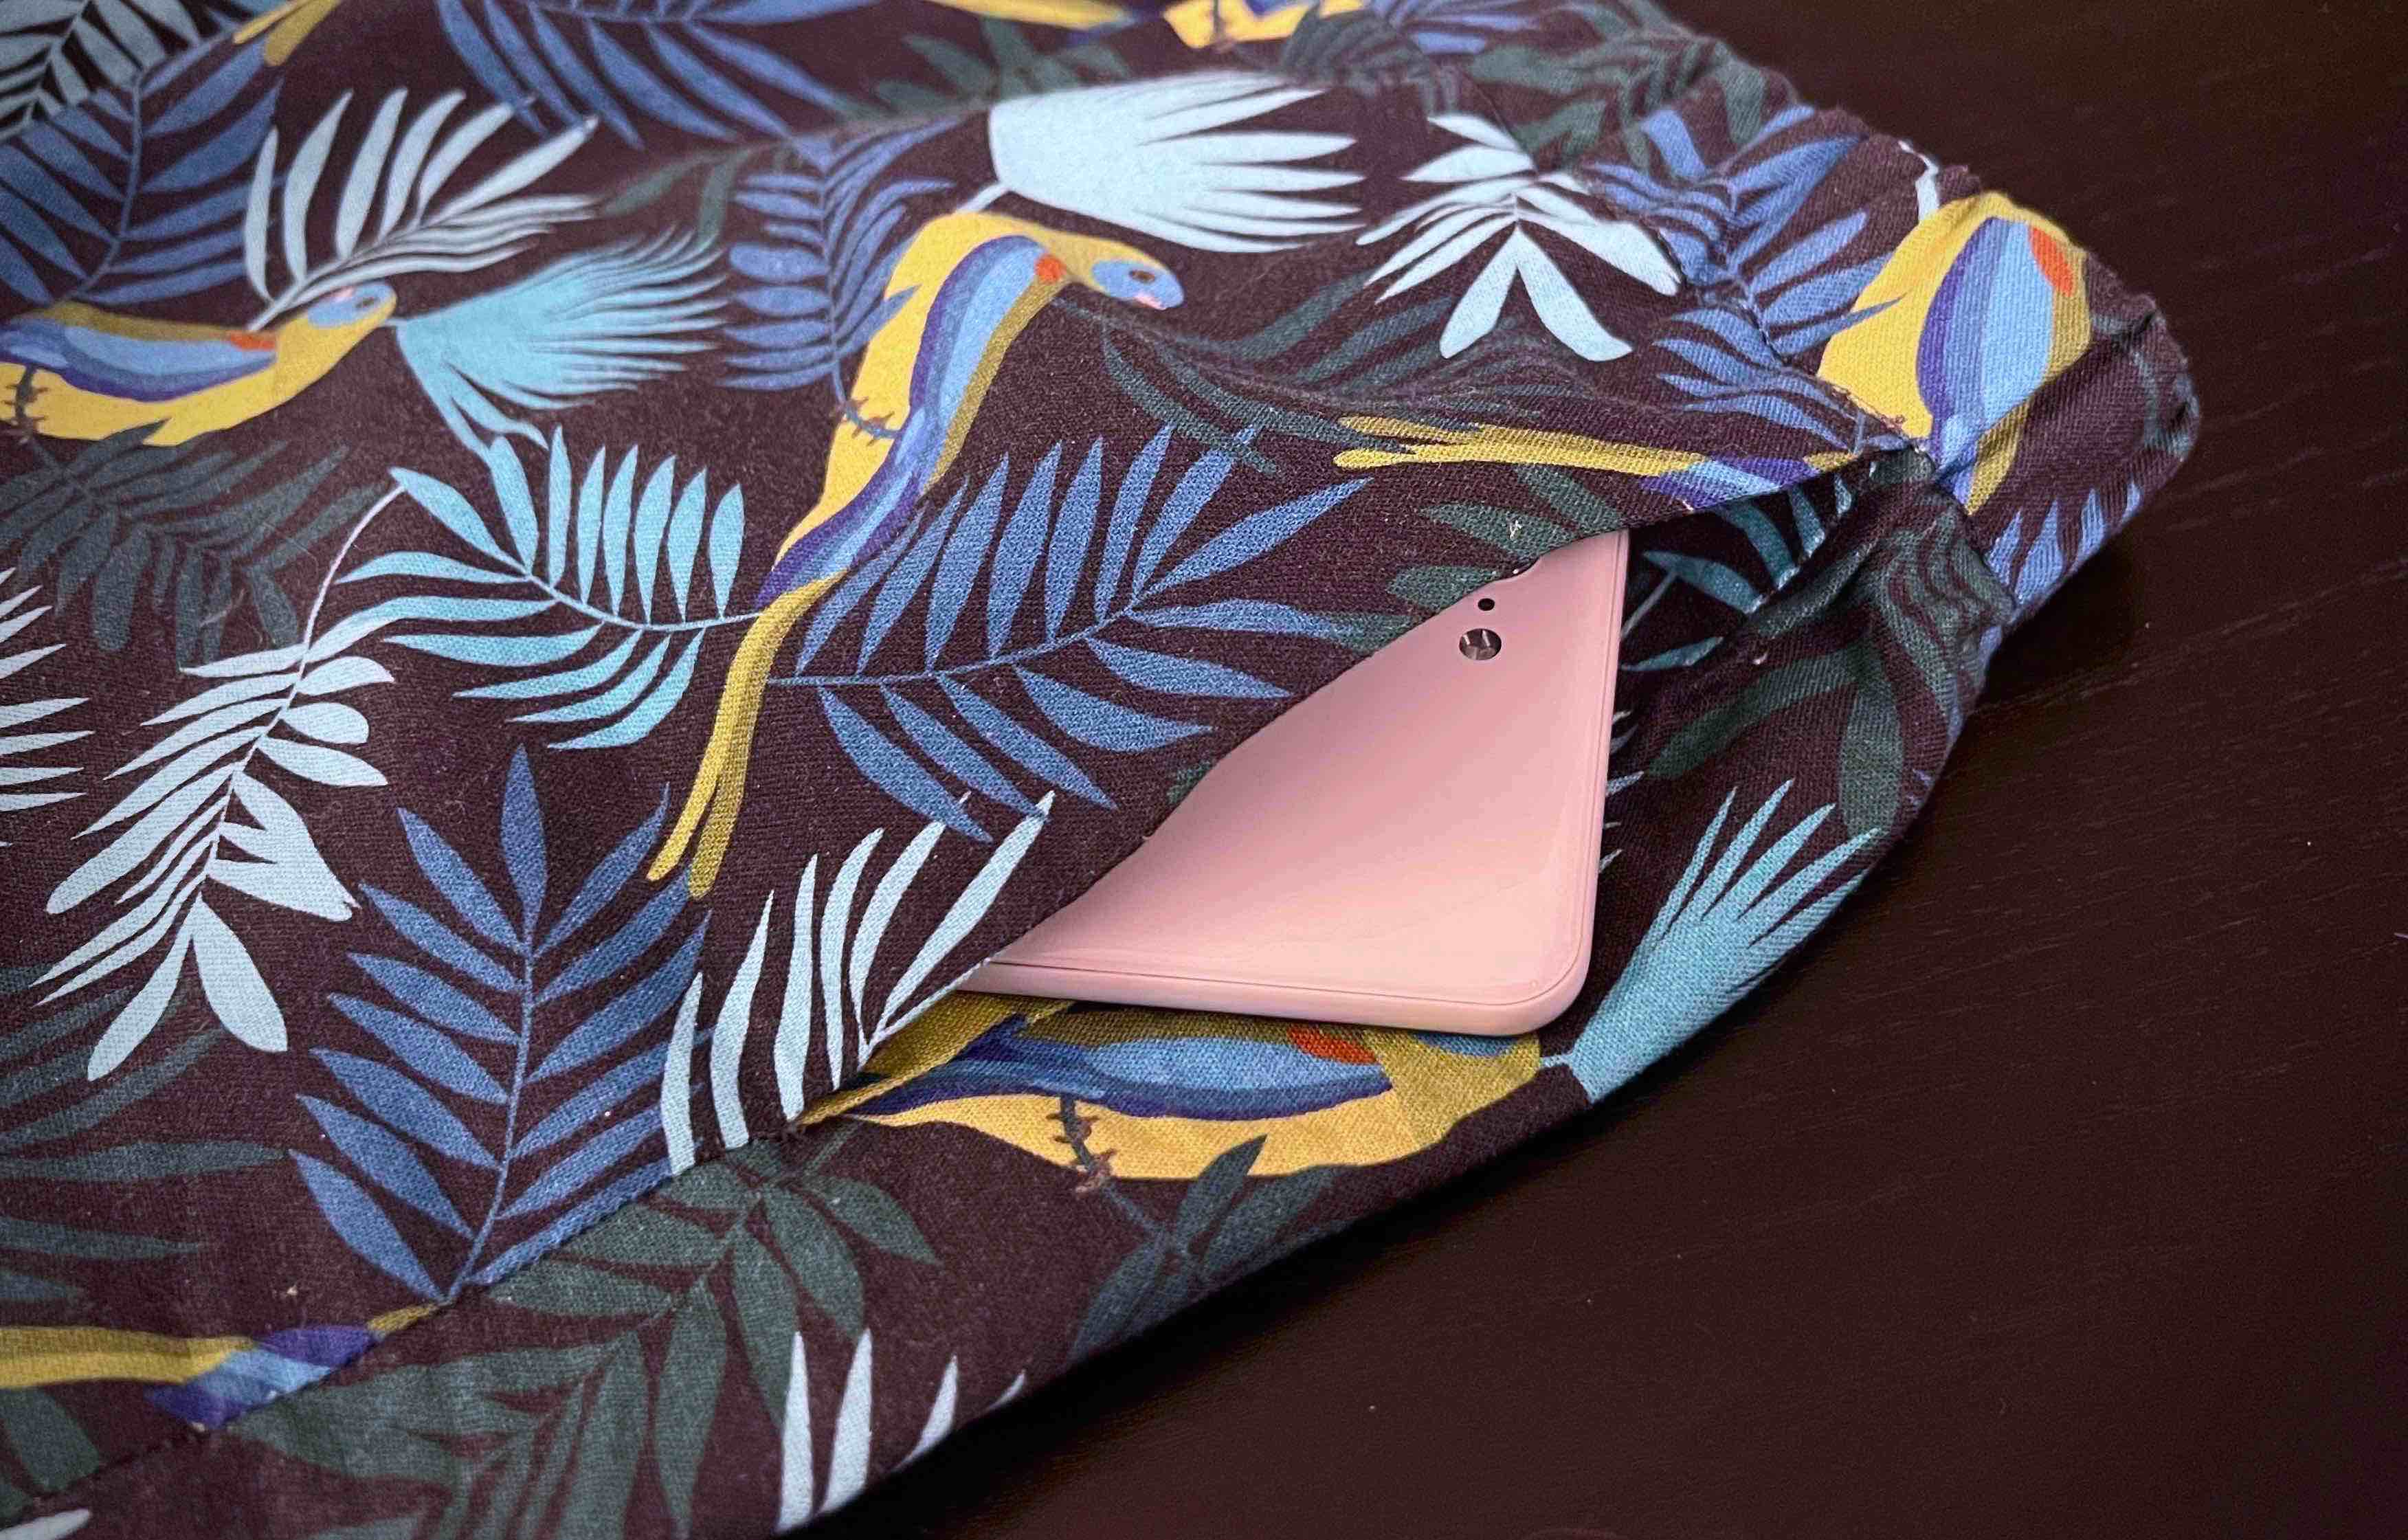
When completed, this is how the garment will look from the outside: